This tutorial provides clear, step-by-step instructions for all Mountain Top University academic, administrative, and technical staff to sign in with their official @mtu.edu.ng account, populate their academic and career records (including qualifications, department, designation, publications, and LinkedIn), and manage their public email privacy settings.
STEP 1 Accessing the Directory Landing Page
Select ‘Staff Login’ on the landing page. On mobile devices, tap the hamburger menu (☰) at the top-right corner to access the option.
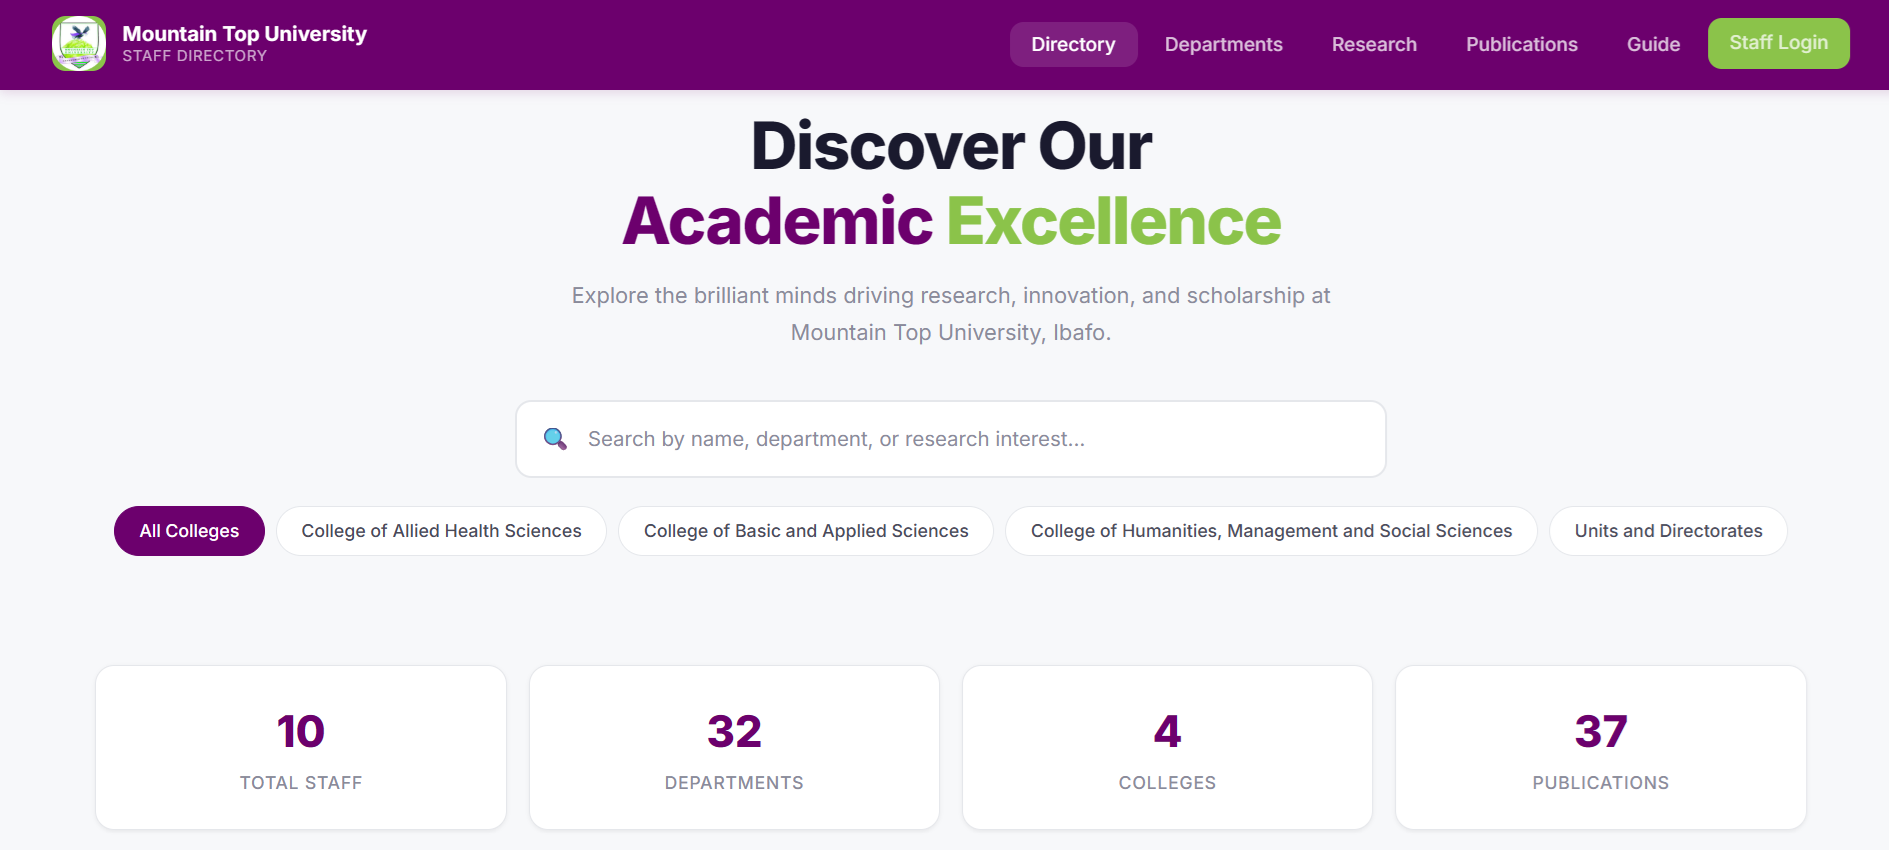
Figure 1: Mountain Top University Staff Directory homepage with the 'Staff Login' button in the top navigation bar.
STEP 2 Signing in with Google Workspace (@mtu.edu.ng)
Clicking the Staff Login button directs you to the portal authentication screen:
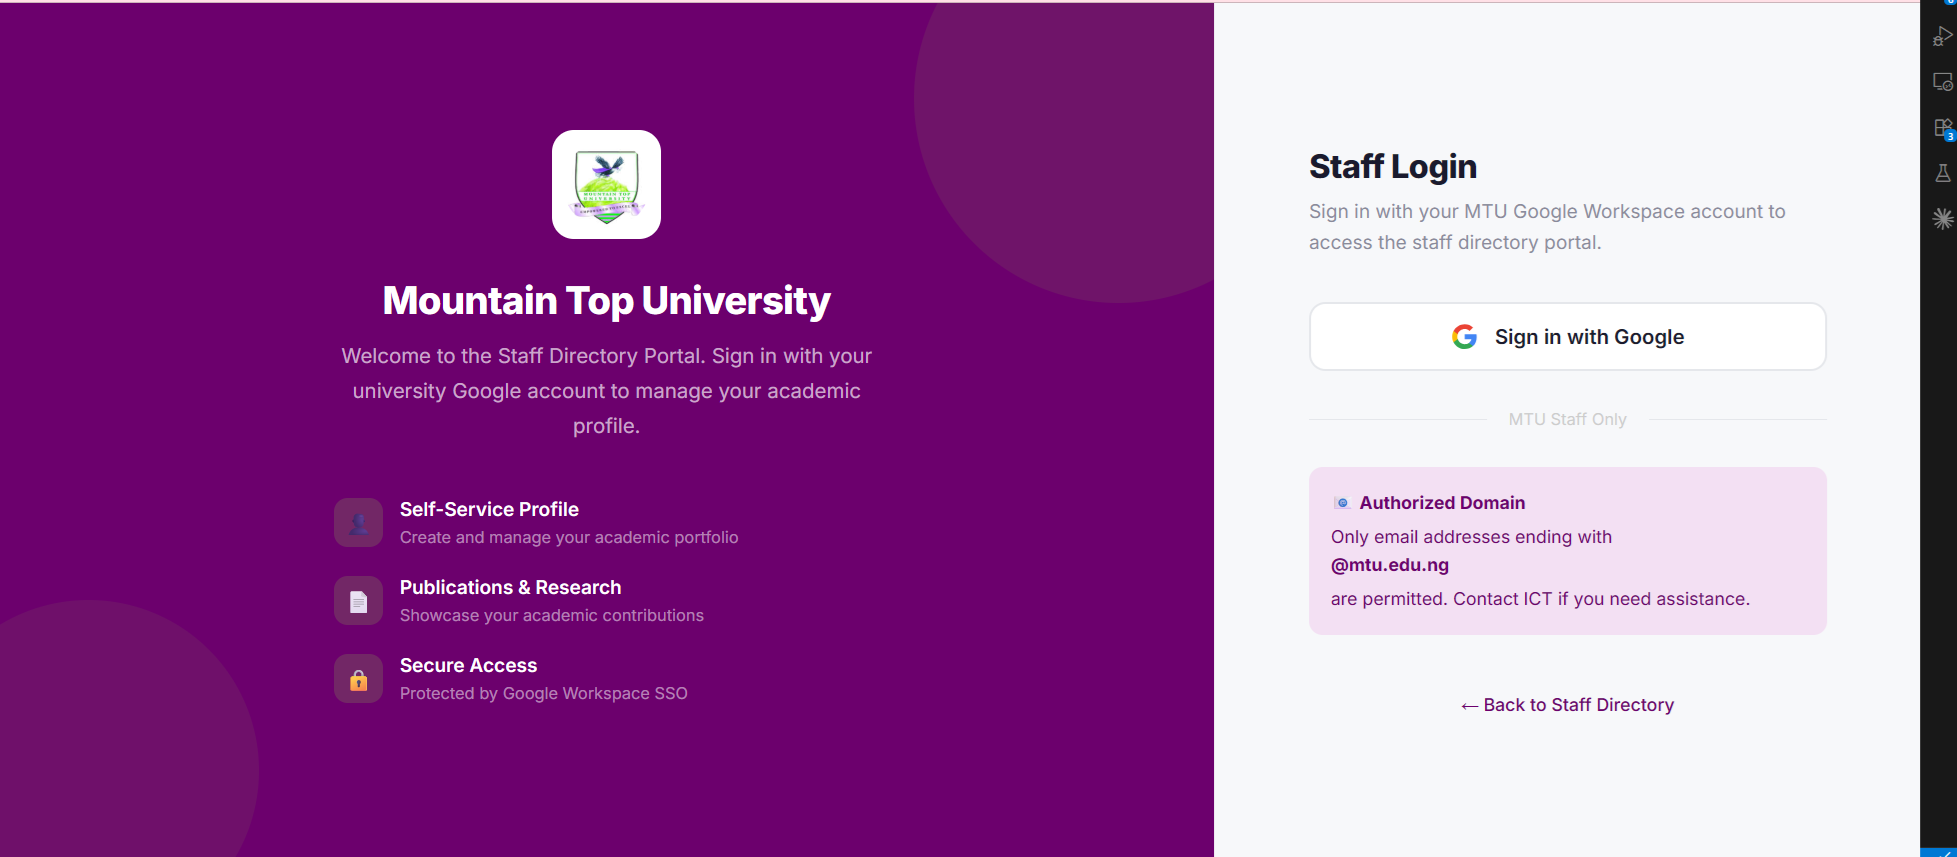
Figure 2: Secure Google Single Sign-On portal authentication screen for MTU staff.
- On the login page, click the “Sign in with Google” button.
- In the Google account chooser prompt, select your official institutional university email address (e.g.
username@mtu.edu.ng).
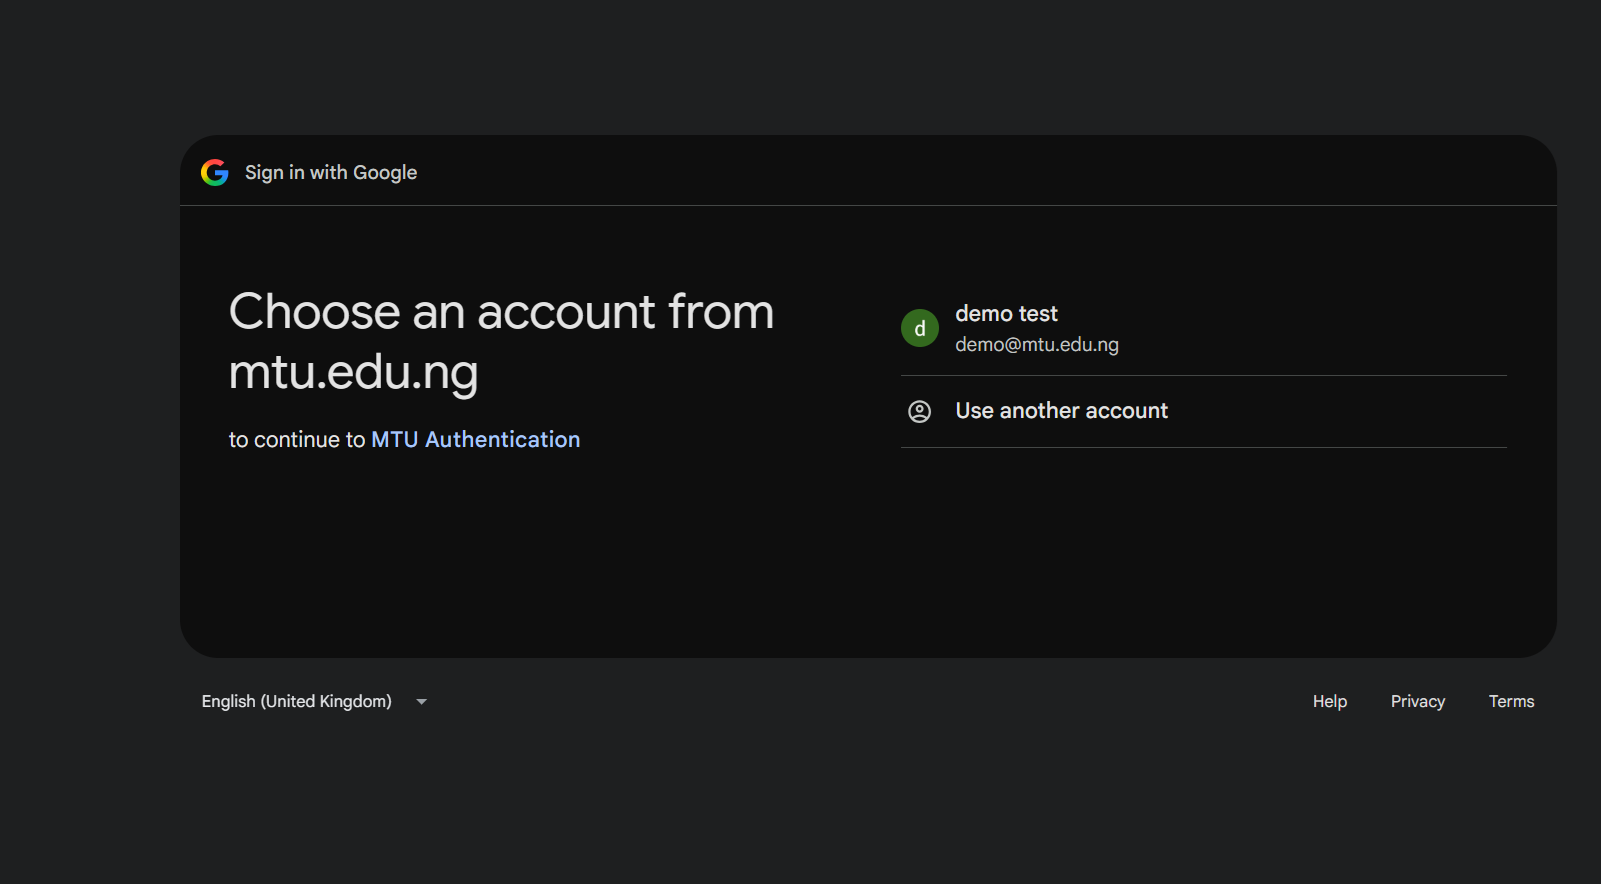
Figure 3: Google account chooser prompt restricting sign-in to authorized @mtu.edu.ng accounts.
- Enter your university Google password to authorize access and proceed into the portal.
Authorized Domain Notice: Access is strictly restricted to active accounts ending in @mtu.edu.ng. Personal Gmail accounts (@gmail.com) are not permitted on the staff portal.
STEP 3 First-Time Profile Creation
When you sign in for the first time, the portal automatically presents the initial Create Staff Profile form to capture your core institutional data:
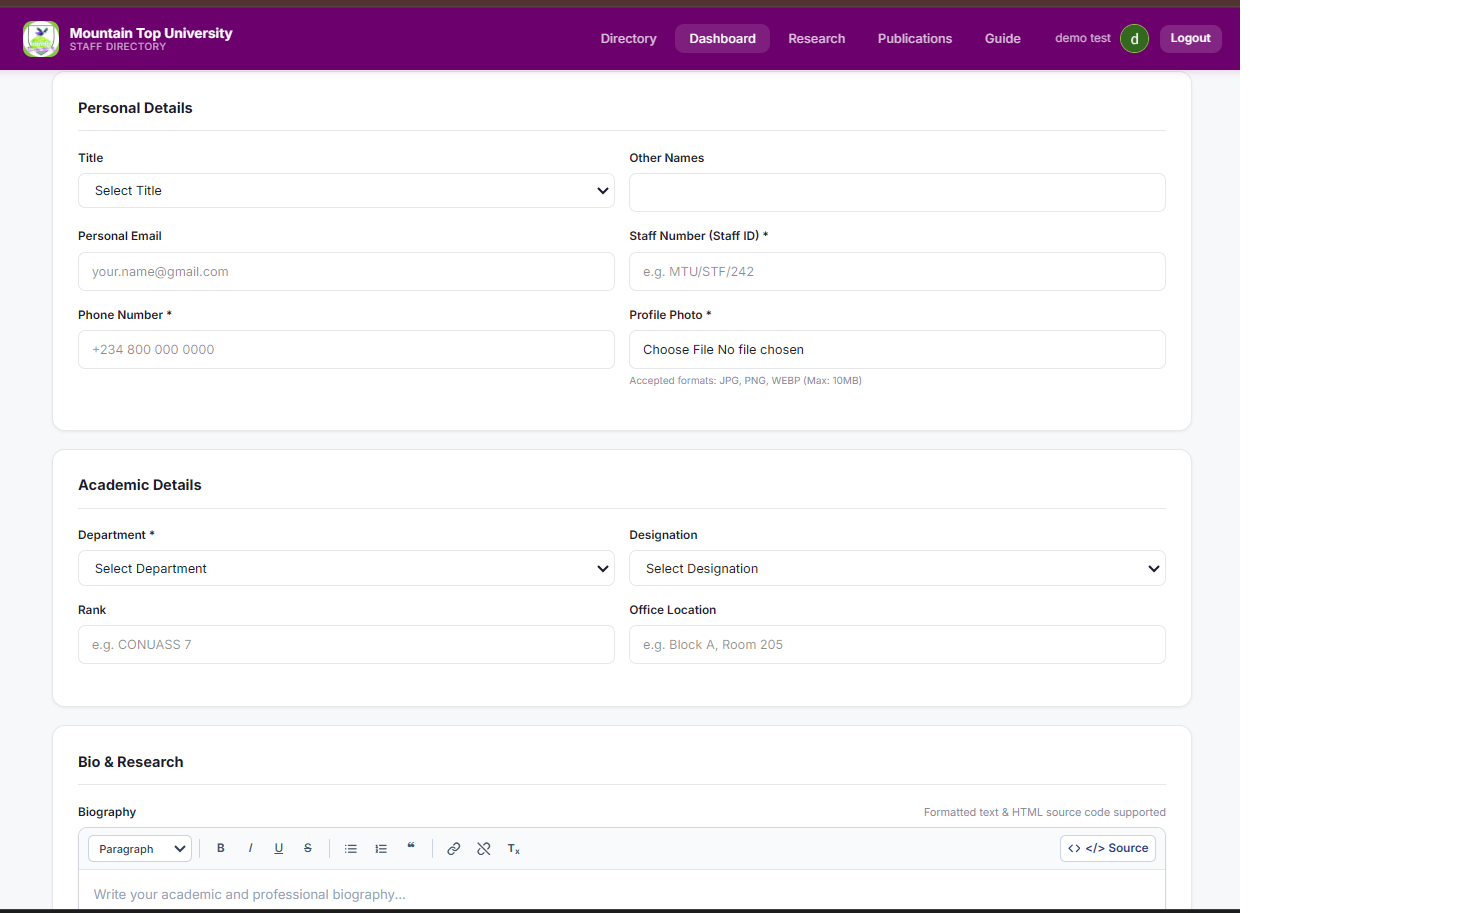
Figure 4: Initial staff profile creation setup screen (Personal Details, Academic Details, and Biography).
- Personal Details:
- Title: Select your title (Prof., Dr., Mr., Mrs., Engr., Arc.).
- Other Names: Enter any middle or additional names (your First & Last names are automatically fetched from your verified Google account).
- Personal Email: (Optional) Enter your secondary/personal email.
- Staff Number (Staff ID) *: Enter your official university staff identification number (e.g.
MTU/STF/242).
- Phone Number *: Enter your active phone number. (Phone numbers are protected from the public by default and only visible to signed-in MTU colleagues).
- Profile Photo *: Upload a professional passport-style photograph (JPEG, PNG, or WEBP format, up to 10MB).
- Academic Details:
- Department *: Select your academic department or administrative unit/directorate (e.g. Computer Science, Biological Sciences, Registry, ICT Centre, Bursary).
- Designation *: Select your official university designation / rank from the comprehensive 110-entry list (e.g. Professor, Senior Lecturer, Lecturer I, Administrative Officer I, System Analyst, Programmer, Technologist II, Accountant I, Medical Officer I, etc.).
- Rank: (Optional) Enter your salary scale or grade (e.g. CONUASS 7, CONTISS 11).
- Office Location: (Optional) Enter your office room or building (e.g. Block A, Room 205).
- Bio & Research:
- Write a professional academic summary highlighting your teaching disciplines, administrative background, or scholarly focus using the rich-text editor.
- Click “Create Profile” at the bottom of the page to submit.
STEP 4 Your Personal Staff Dashboard
Once your profile is created, you are welcomed to your personal Staff Dashboard, where you can manage every aspect of your university portfolio:
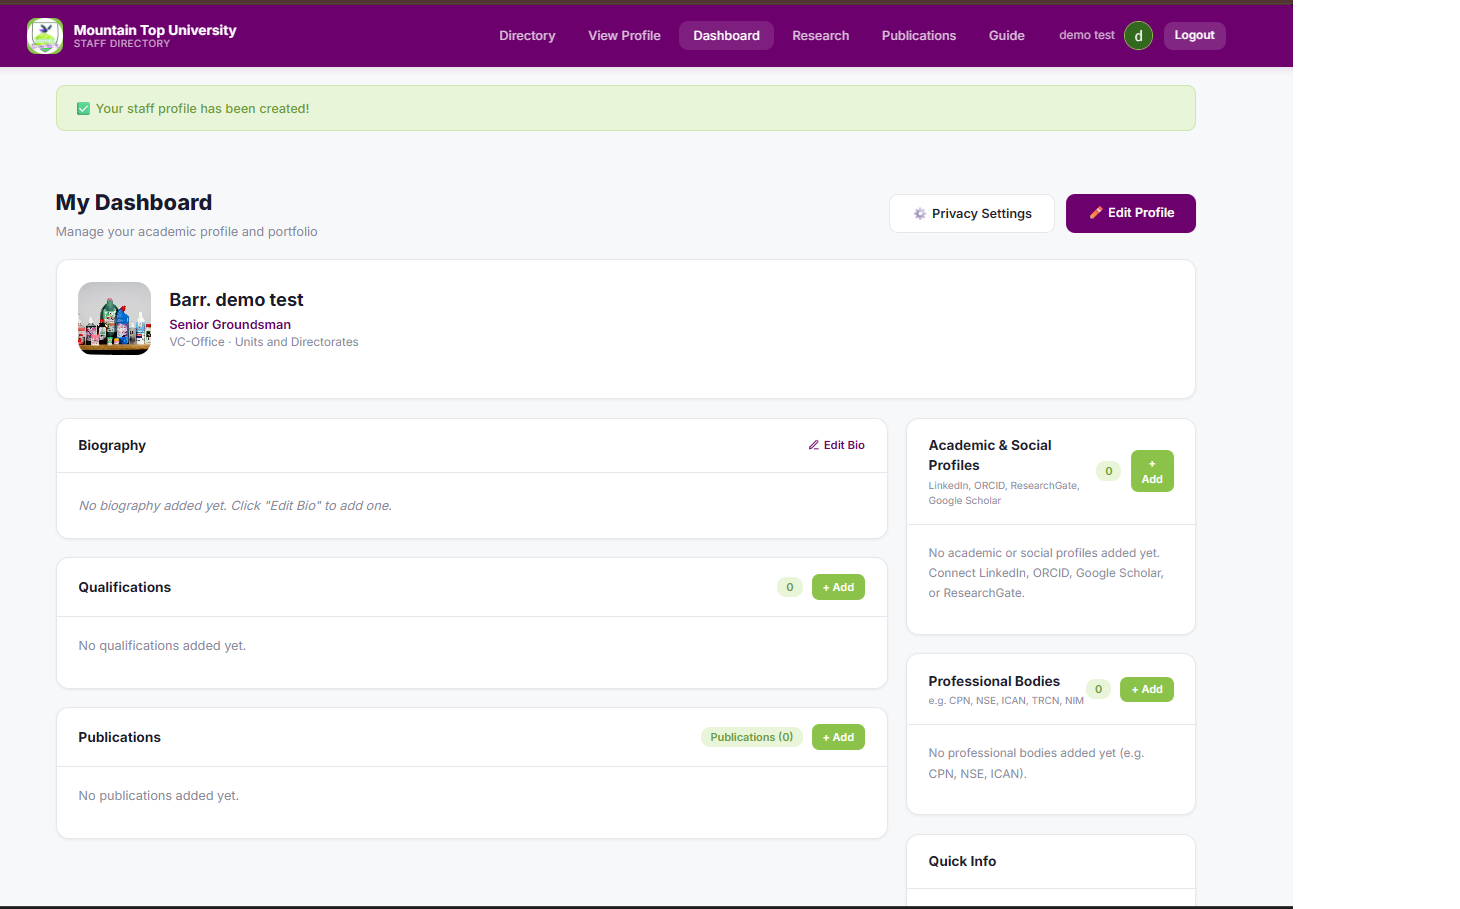
Figure 5: Staff Dashboard overview showing profile card, Privacy Settings, Qualifications, Publications, and Social Profiles.
- Header Card: Displays your photo, verified name, designation, department/college, and quick-action buttons:
- Privacy Settings: Quick link to control what public guests can view.
- Edit Profile: Update your bio, title, designation, rank, or contact details at any time.
- Quick Sections: Direct “+ Add” buttons to populate Qualifications, Publications, Academic & Social Profiles, and Professional Bodies.
STEP 5 Adding Publications, Qualifications & LinkedIn
Enriching your profile with your research outputs and professional networks increases your visibility and automatically updates your publication count on the university research directory:
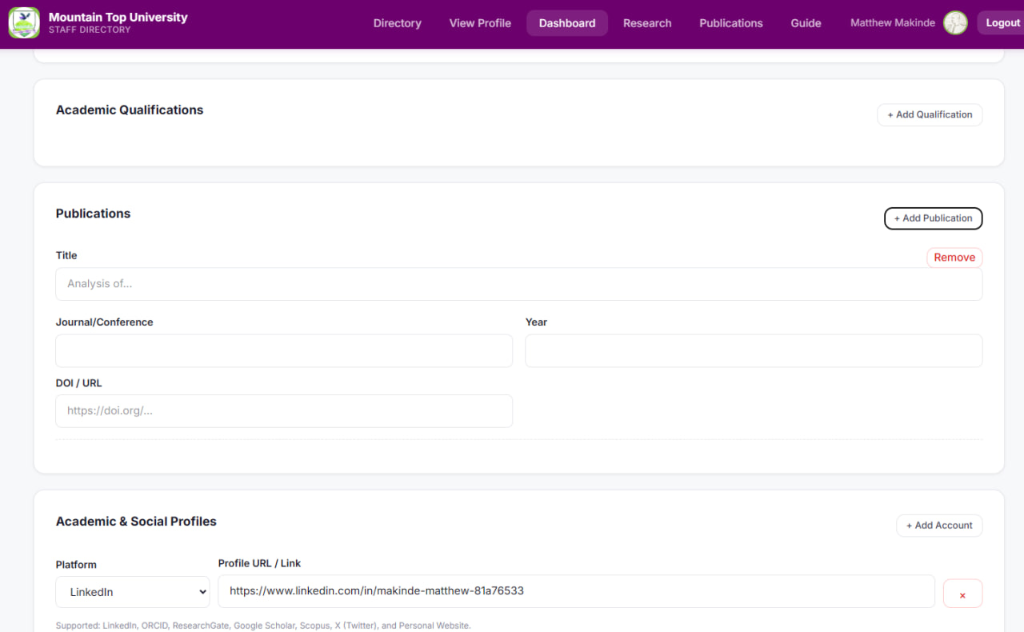
Figure 6: Adding research publications with DOI links and connecting academic & social profiles (LinkedIn, ORCID, etc.).
A. Adding Research Publications:
- On the Publications card, click “+ Add Publication”.
- Enter the Title of your journal article, conference paper, or book chapter.
- Enter the Journal / Conference name, Year of publication, and the DOI / URL link (e.g.
https://doi.org/...).
- Click “+ Add Publication” to add additional publications as needed.
B. Connecting LinkedIn & Academic Accounts:
- On the Academic & Social Profiles card, click “+ Add Account”.
- From the Platform dropdown, choose LinkedIn, Google Scholar, ORCID, ResearchGate, Scopus, or X (Twitter).
- Paste your direct profile URL into the Profile URL / Link field (e.g.
https://www.linkedin.com/in/makinde-matthew-81a76533).
C. Adding Academic Qualifications:
- On the Qualifications card, click “+ Add Qualification”.
- Enter your degree/award (e.g. Ph.D., M.Sc., B.Sc., PGD), institution attended, and year of completion.
STEP 6 Managing Official Email Privacy (Public Protection Option)
To shield staff from spam scrapers, automated email harvesters, and unsolicited marketing bots, official university emails are protected from public visitors by default.
- Public Visitors (Not signed in): See
(Sign in to view email) instead of your raw address.
- Authenticated MTU Colleagues: Signed-in university staff and students can always see and click your official email address.
Adjusting Based on Your Personal Preference:
If you prefer your official email address to be visible to the general public (for external collaboration inquiries):
- From your Dashboard, click “Privacy Settings” (or navigate to Public Privacy Settings at the bottom of Edit Profile).
- Locate the toggle/checkbox: “Show email address to the public”.
- Check the box if you want your email visible to anyone on the internet, or leave it unchecked (the recommended default) to keep it protected so that only signed-in university accounts can view it.
- Click “Save Privacy Settings” or “Update Profile”.
STEP 7 Verifying Your Live Public Directory Profile
- Click “View Profile” in the top navigation bar to preview how your profile appears to the public and university community.
- Your public profile showcases your photo, designation, department, badges, biography, qualifications, publications, and social badges.
- As the verified owner of the account, an [Edit Profile] button is provided right on your public card for fast, one-click return to your dashboard whenever you need to add new achievements.